Android Studio Setup
MiniPay is currently only available for Android phones, as it is integrated into Opera Mini.
In case you might not have an Android device and in order to test and view dApps when building on MiniPay, you can use an Android Emulator!
warning
You cannot register a new account for MiniPay using Android Studio, you can only access existing accounts.
In this guide, you will learn how you can setup an Android Simulator to test MiniPay dApps!
Installing Android Studio
- Download Android Studio.
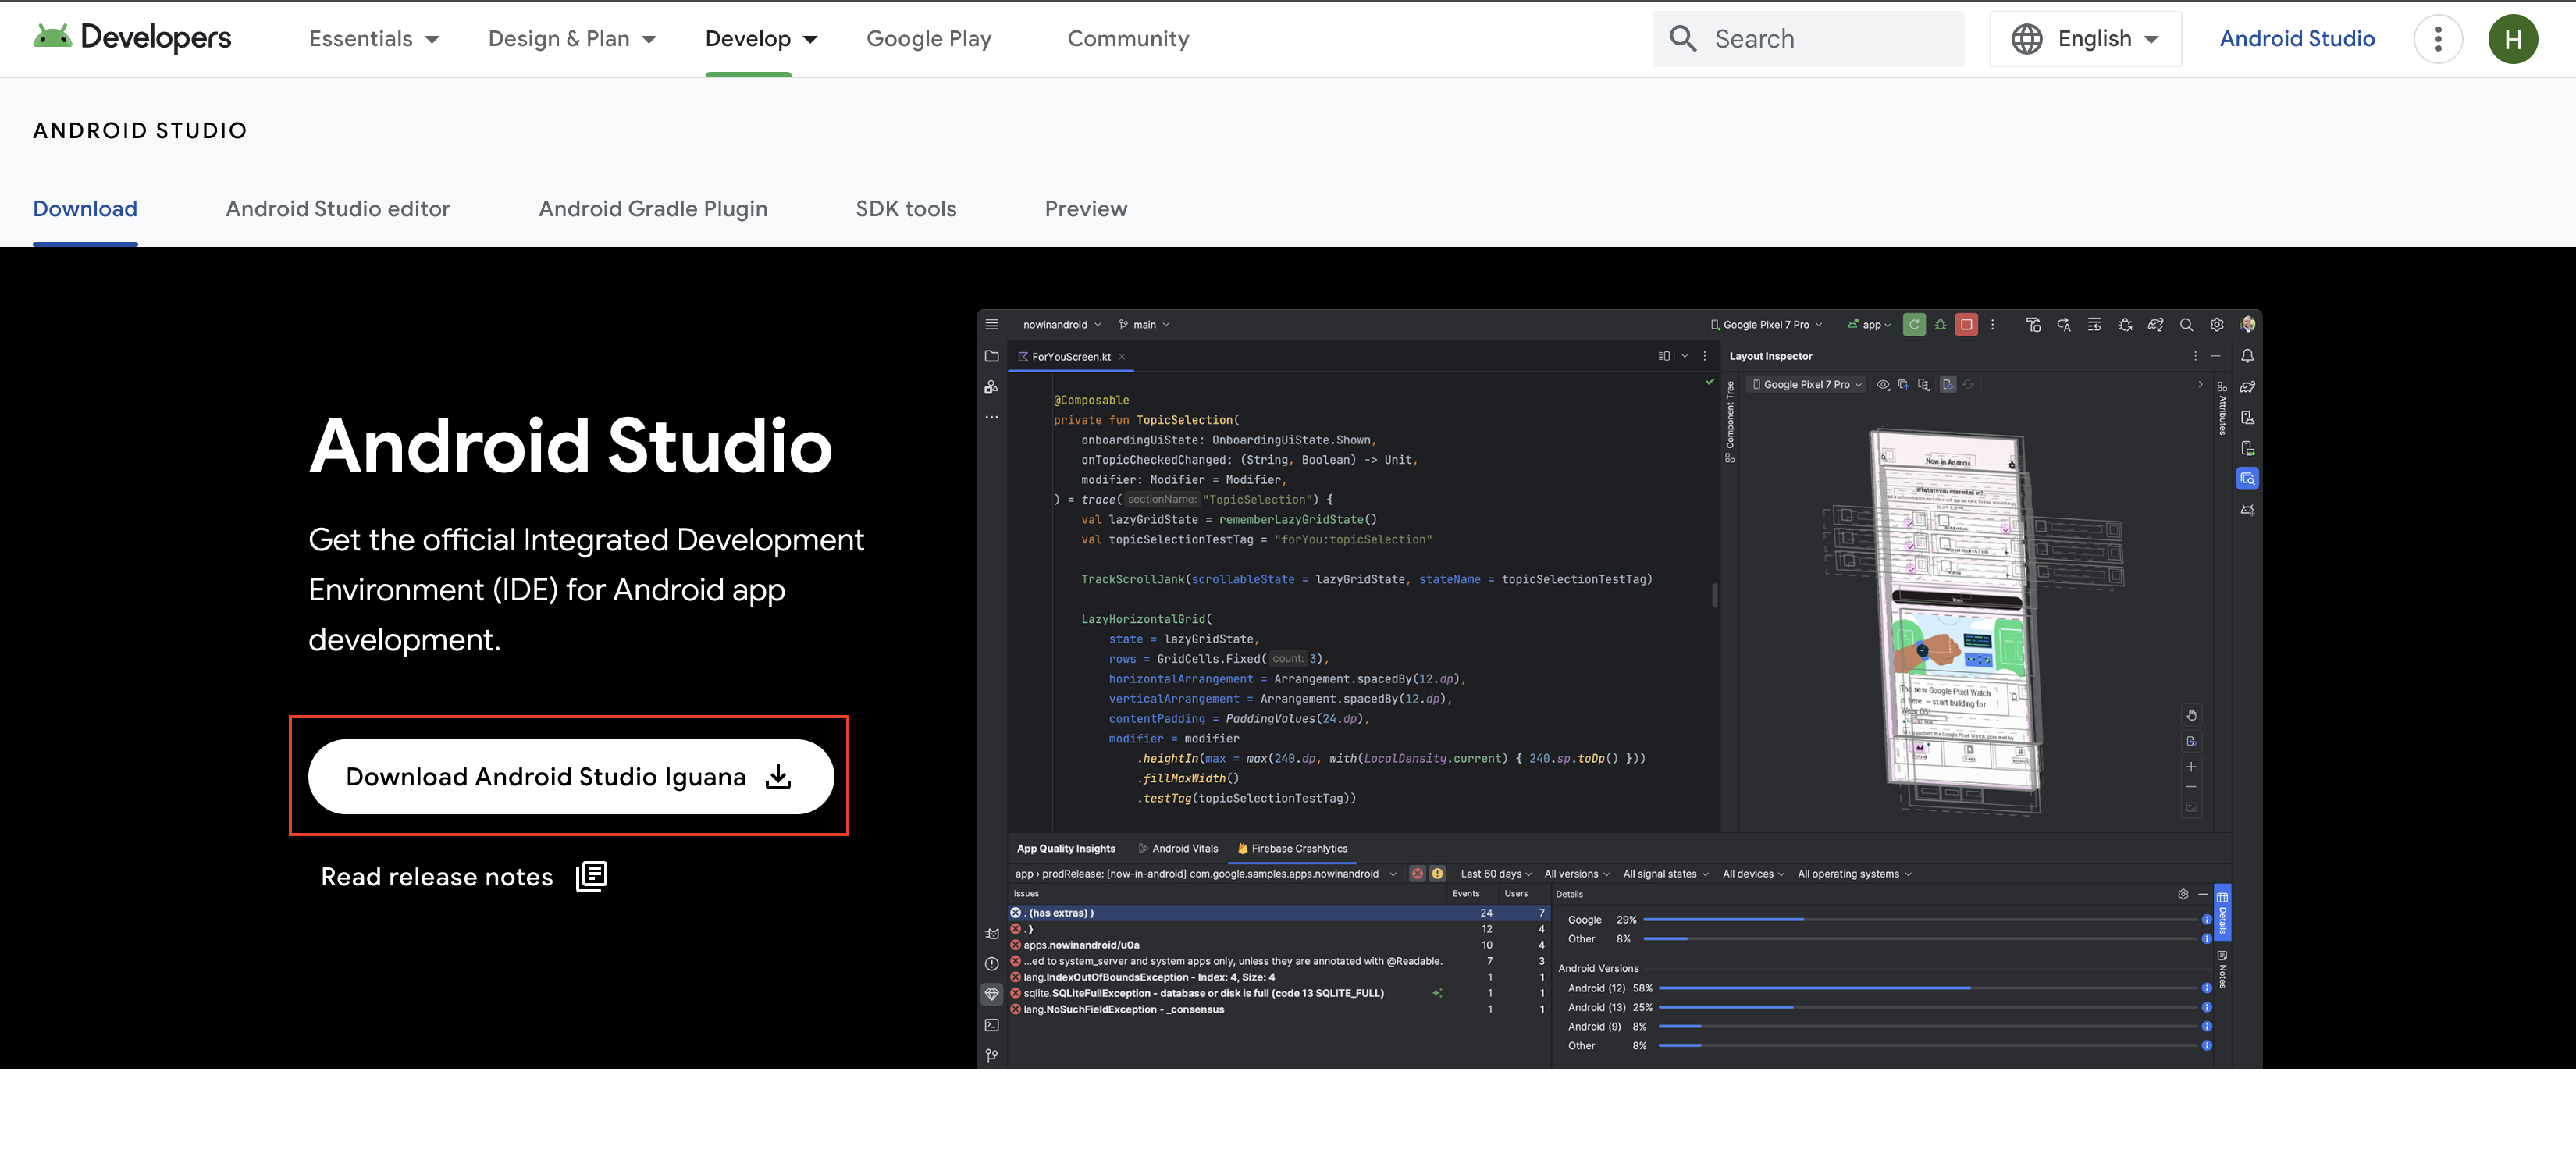
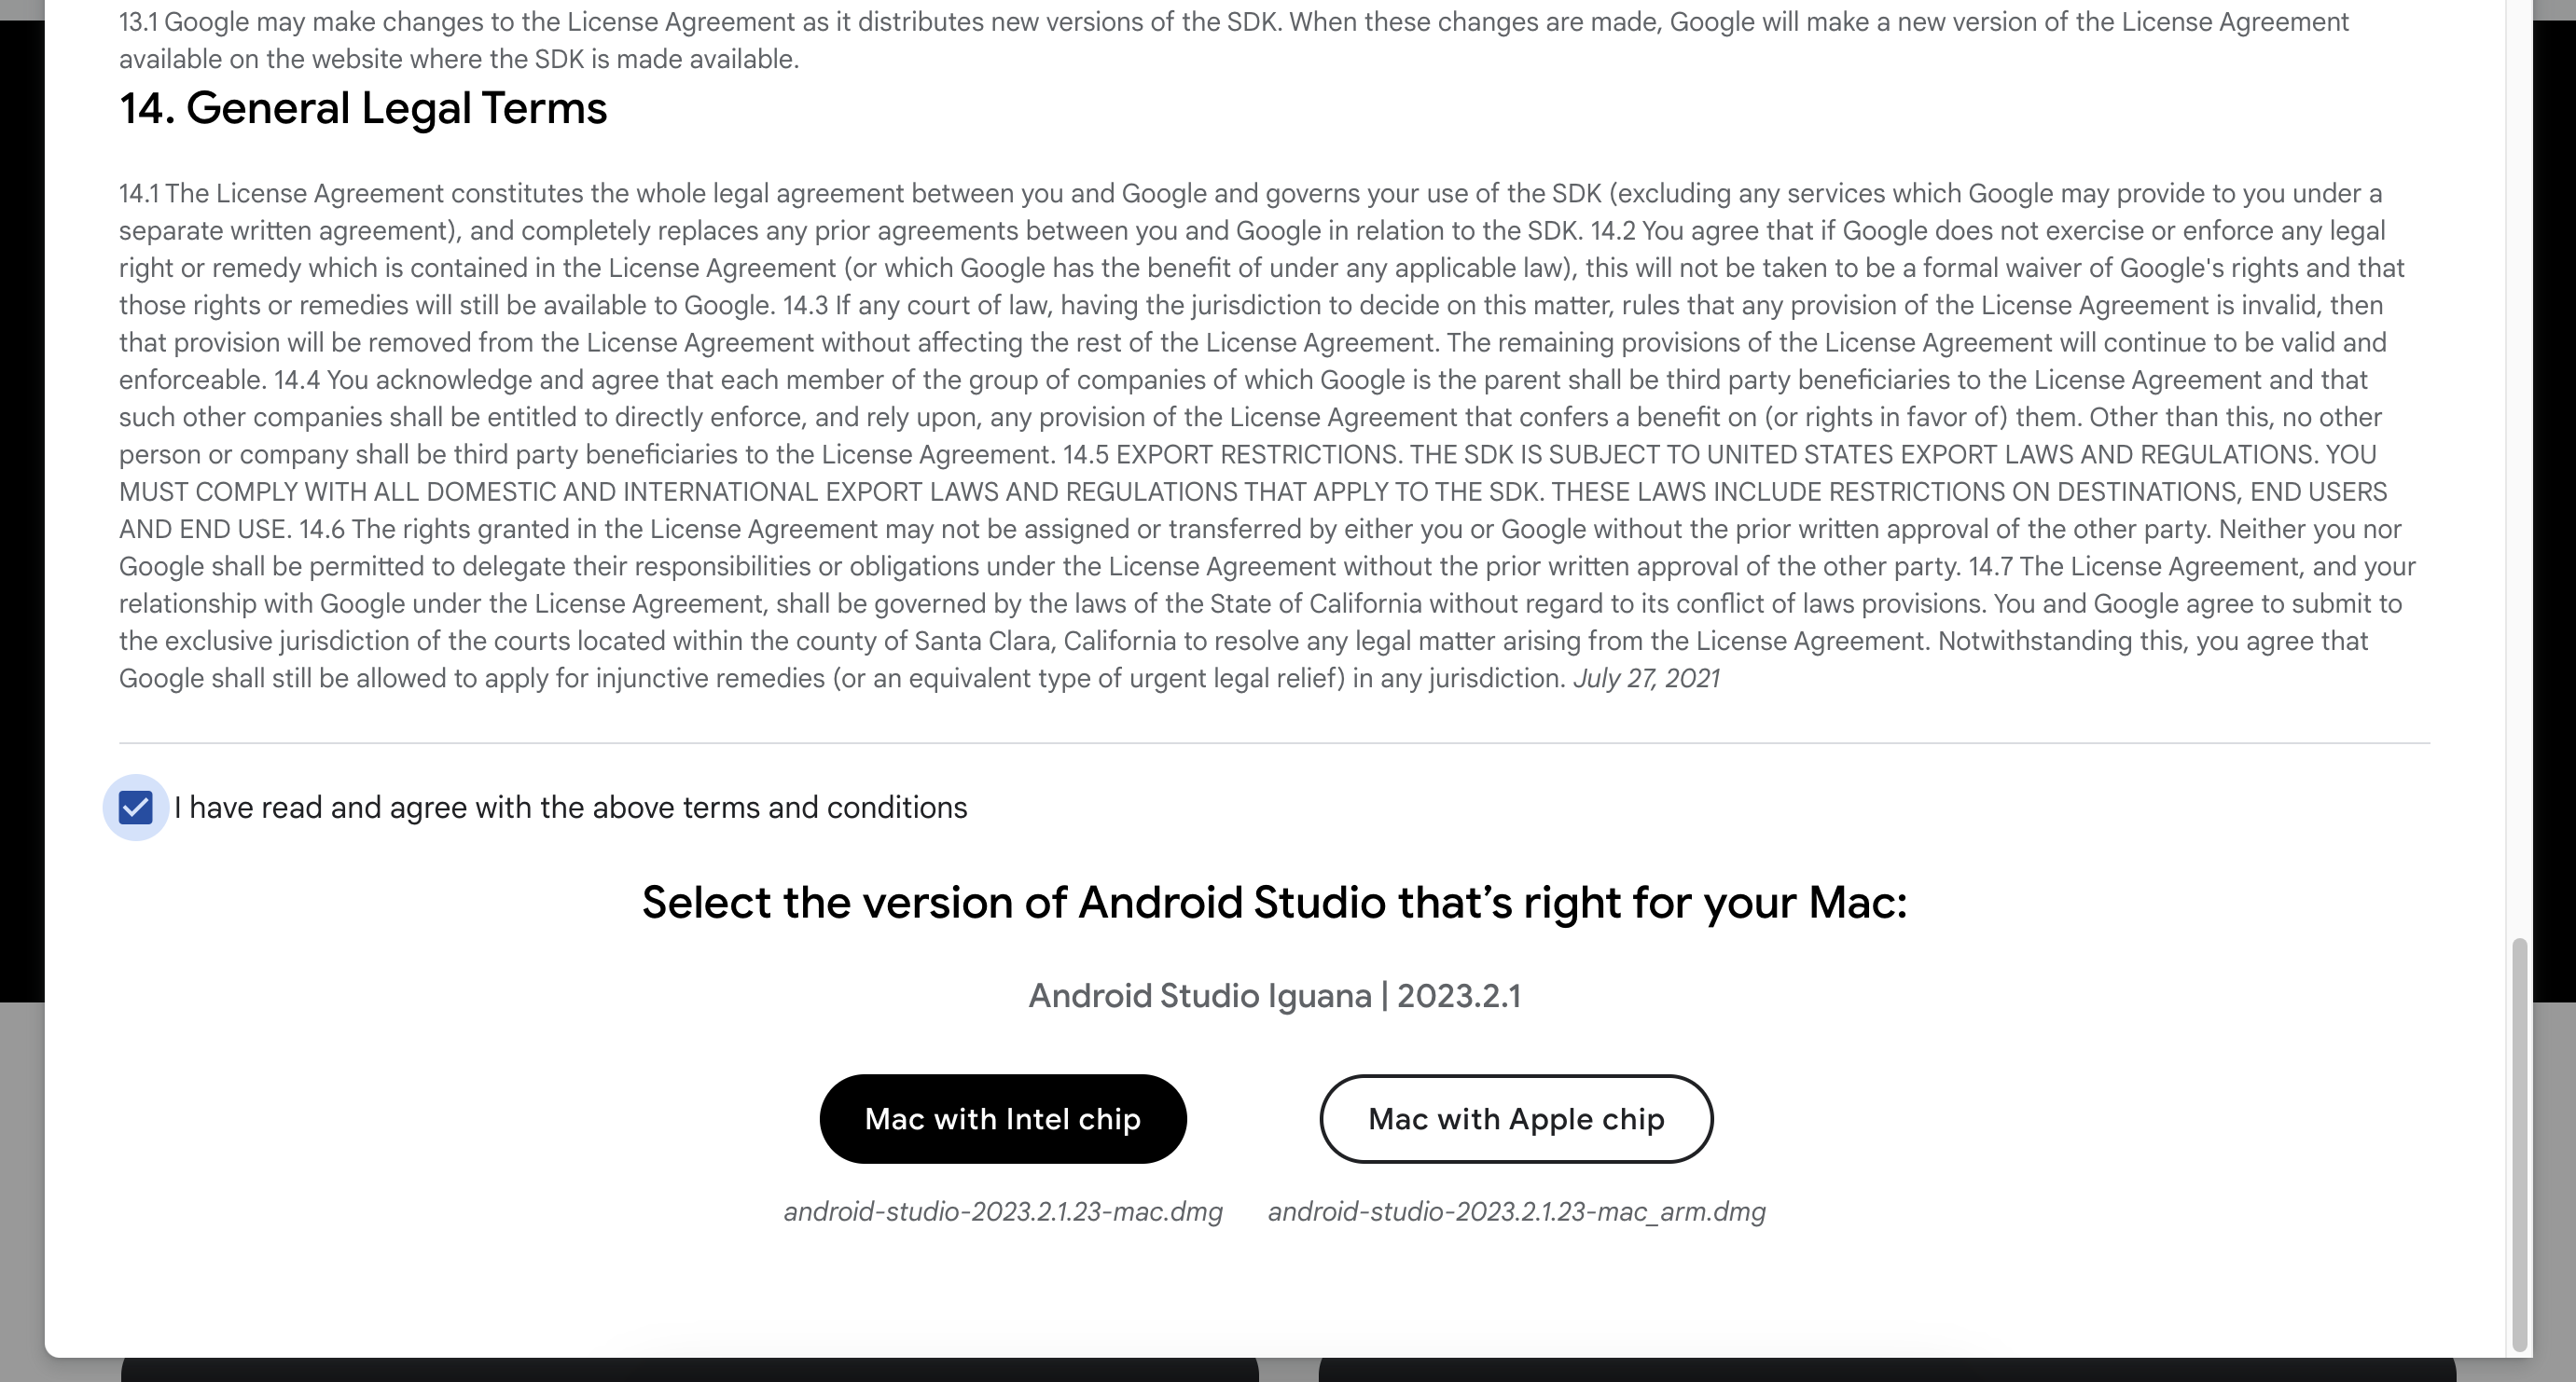
- Select the right version according to your OS and Mac version.
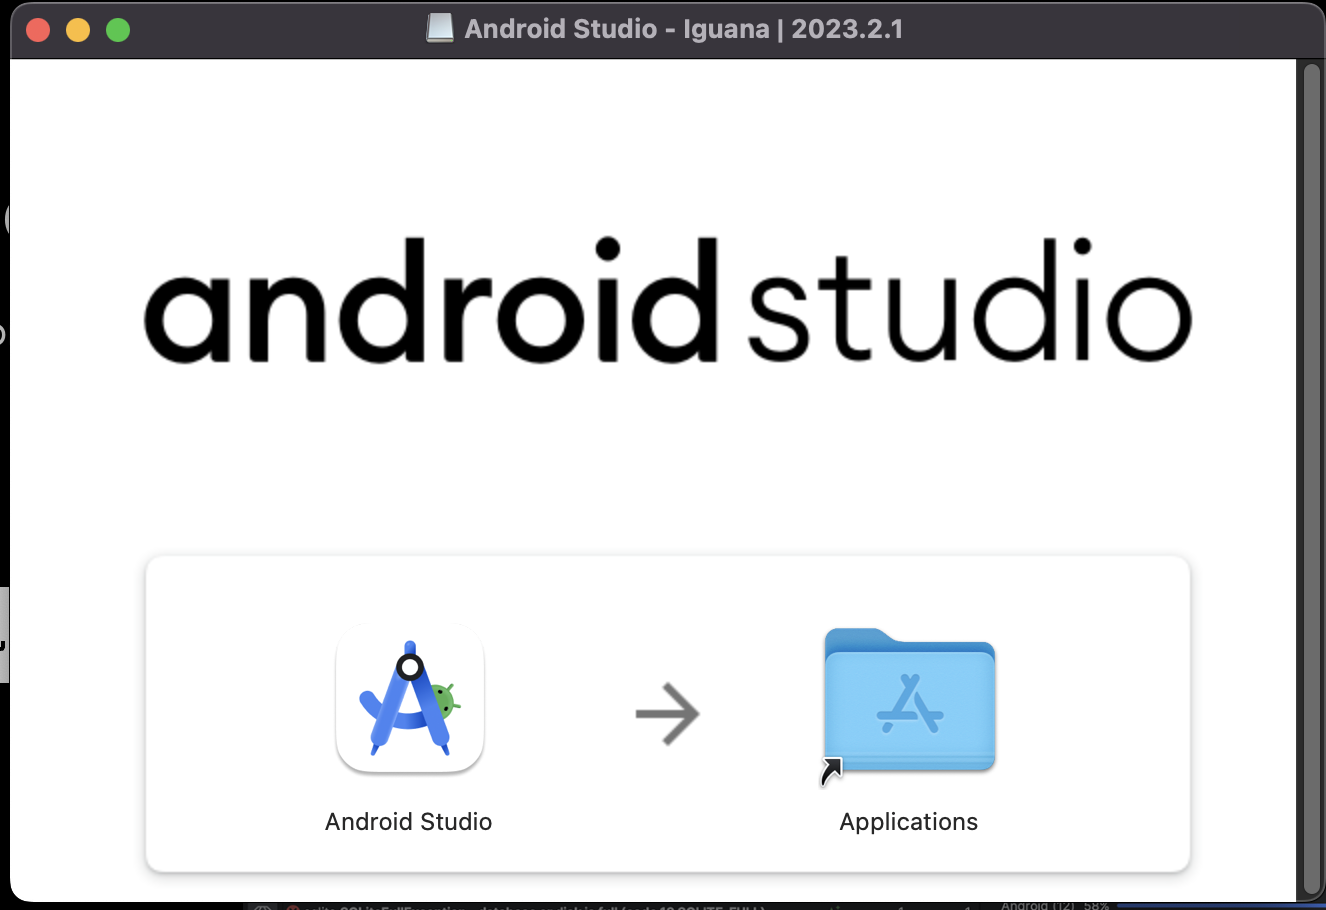
- Add it to your Applications (if you are on Mac) and perform the setup.
If asked for Android Simulator, tick it!
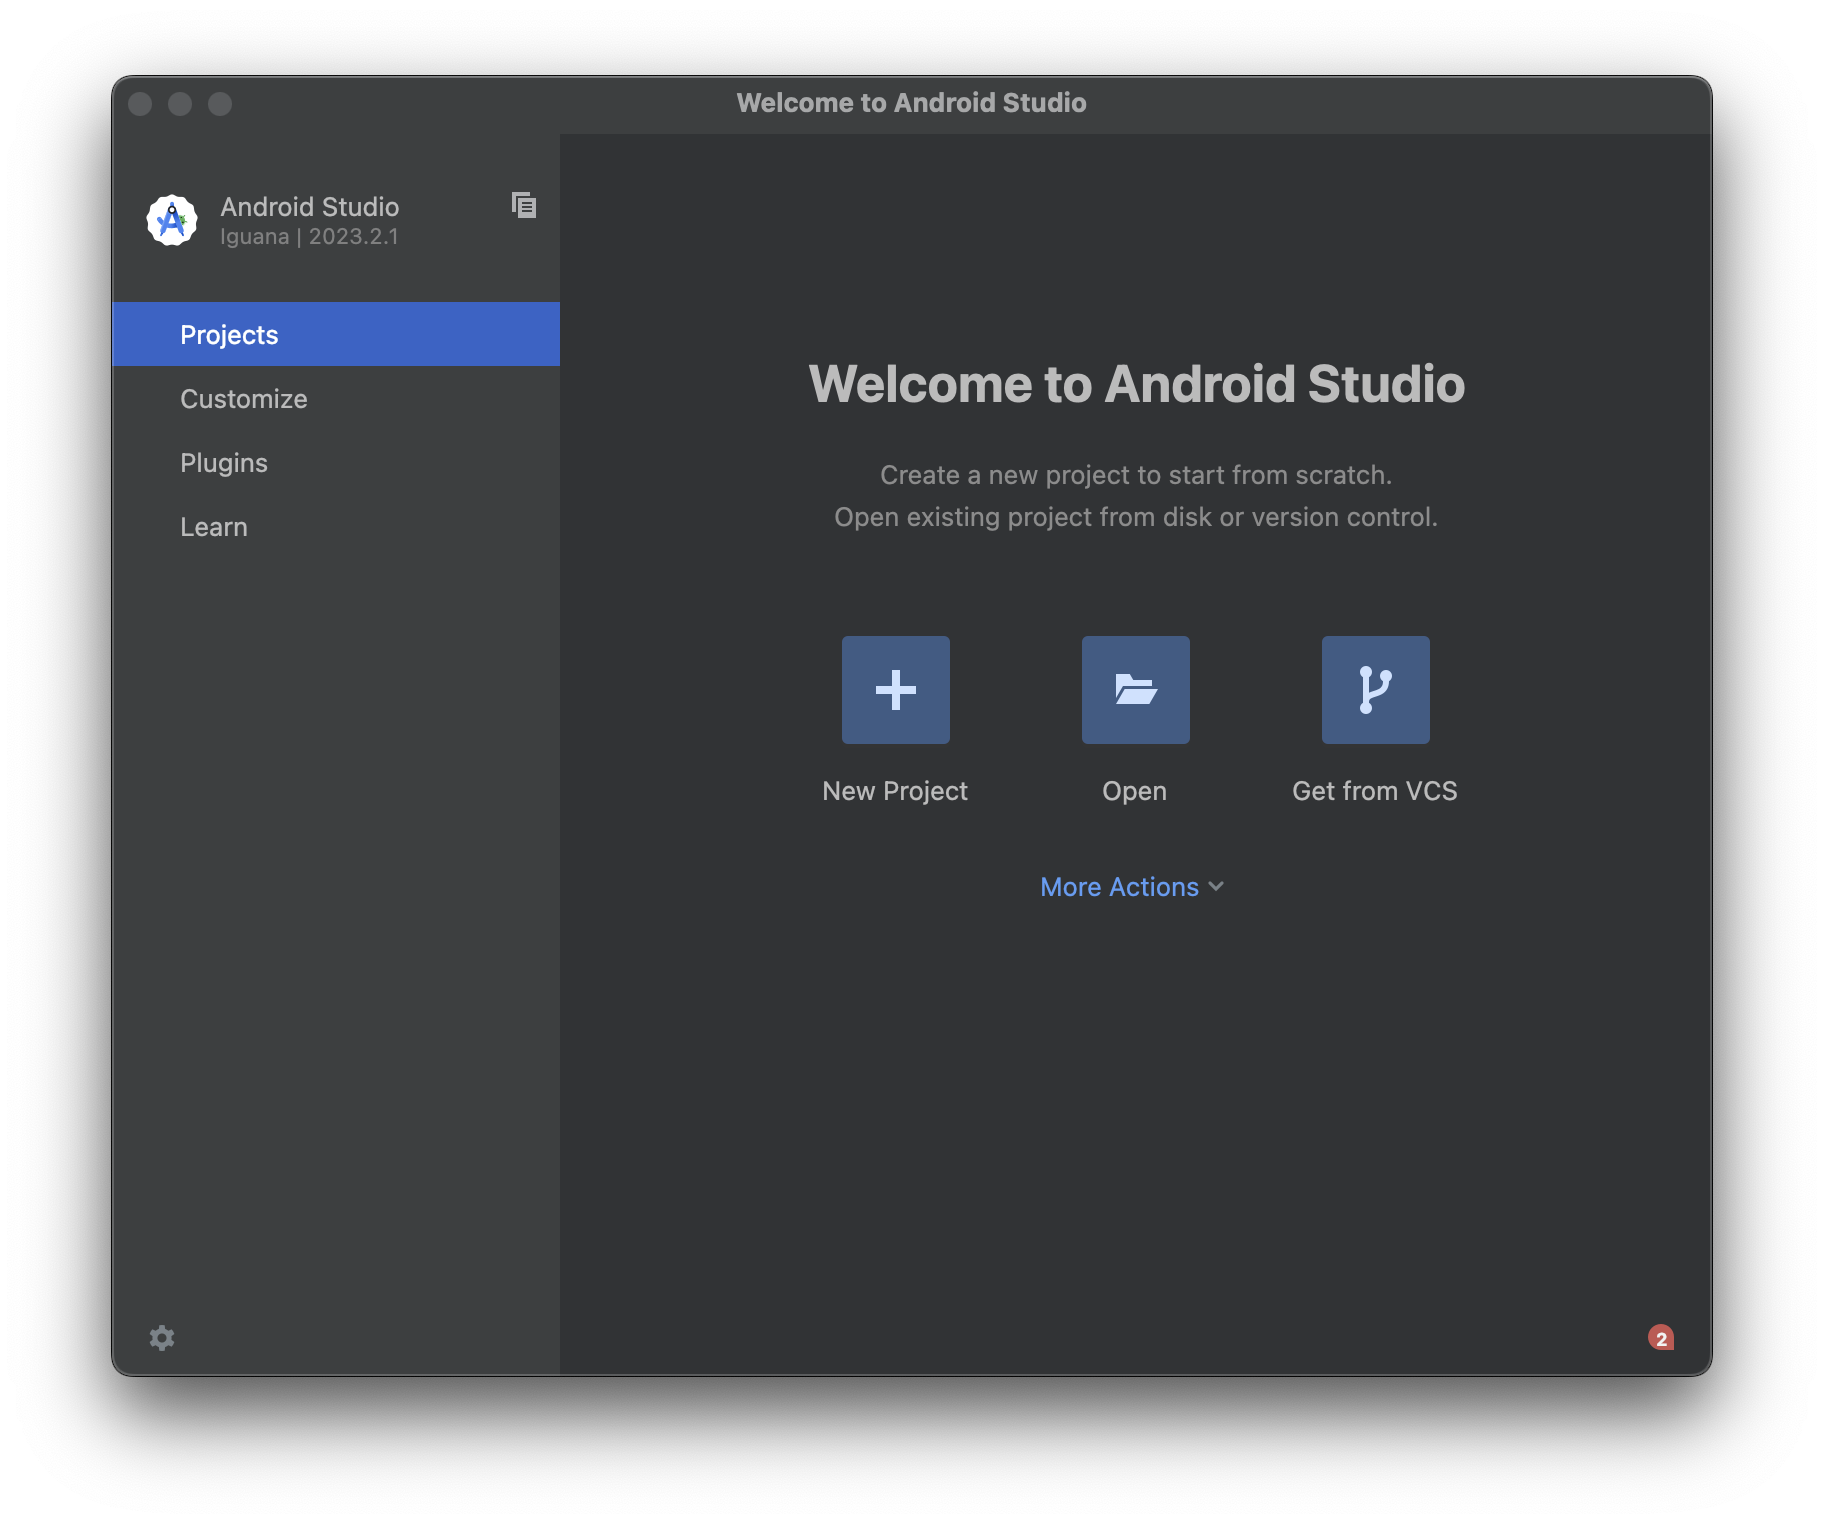
- On successful setup this is how your UI for Android Studio will look like.
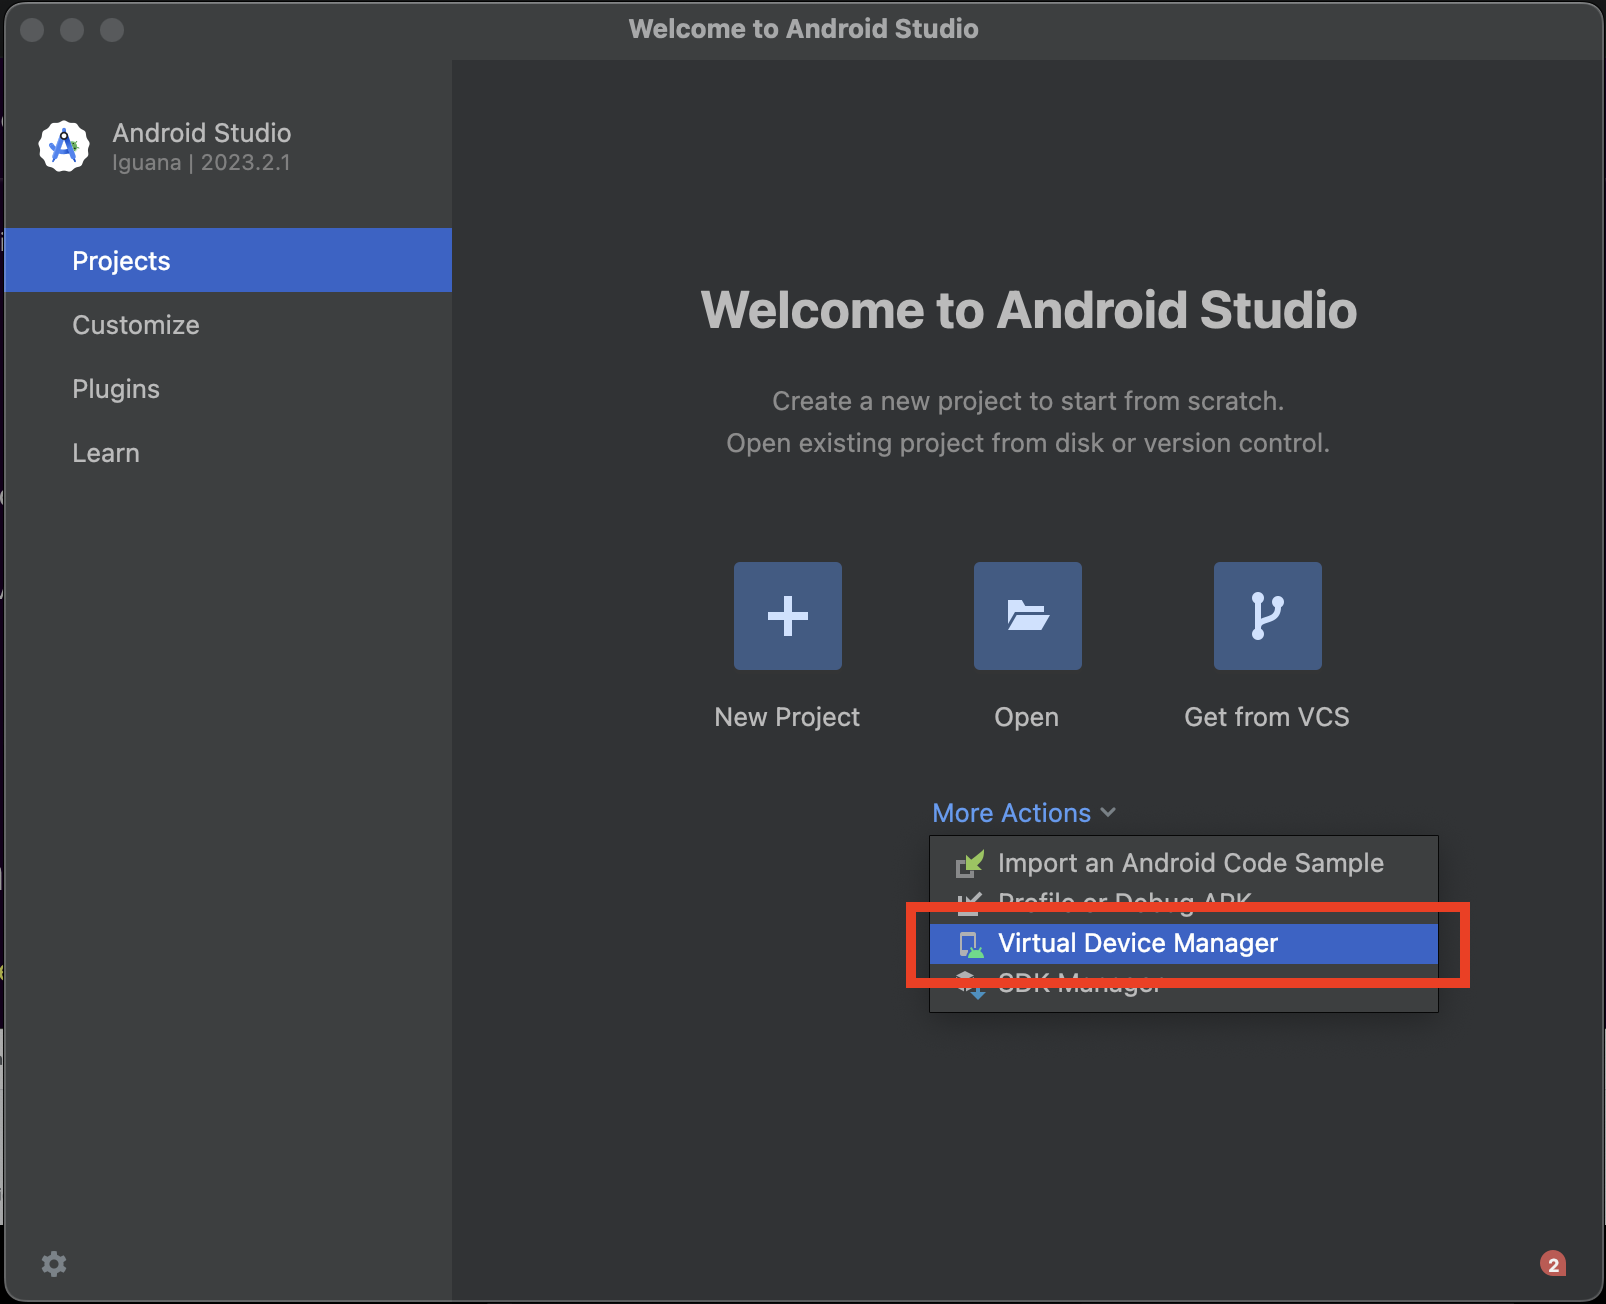
- Click the three dots on right top corner and open "Virtual Device Manager".
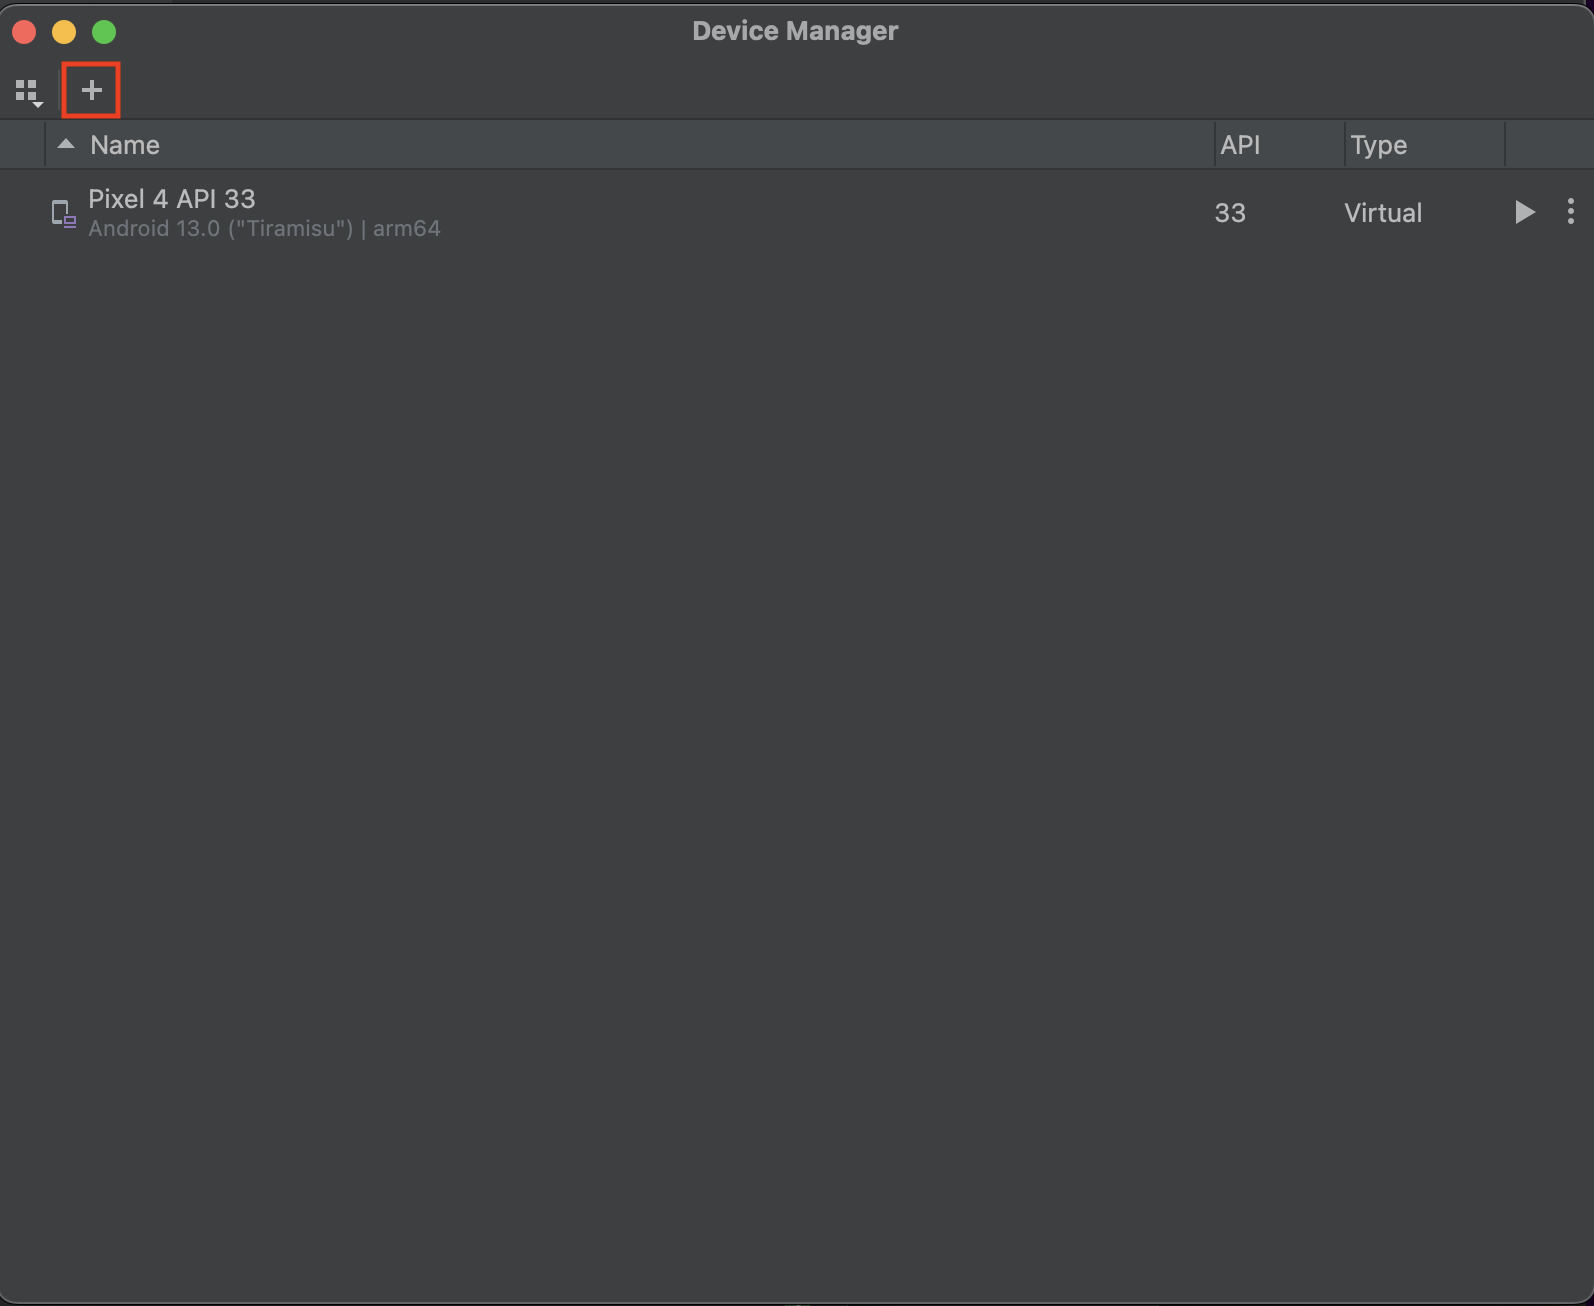
- The Device Manager will show all the existing available devices and you can add a new one by clicking the + button
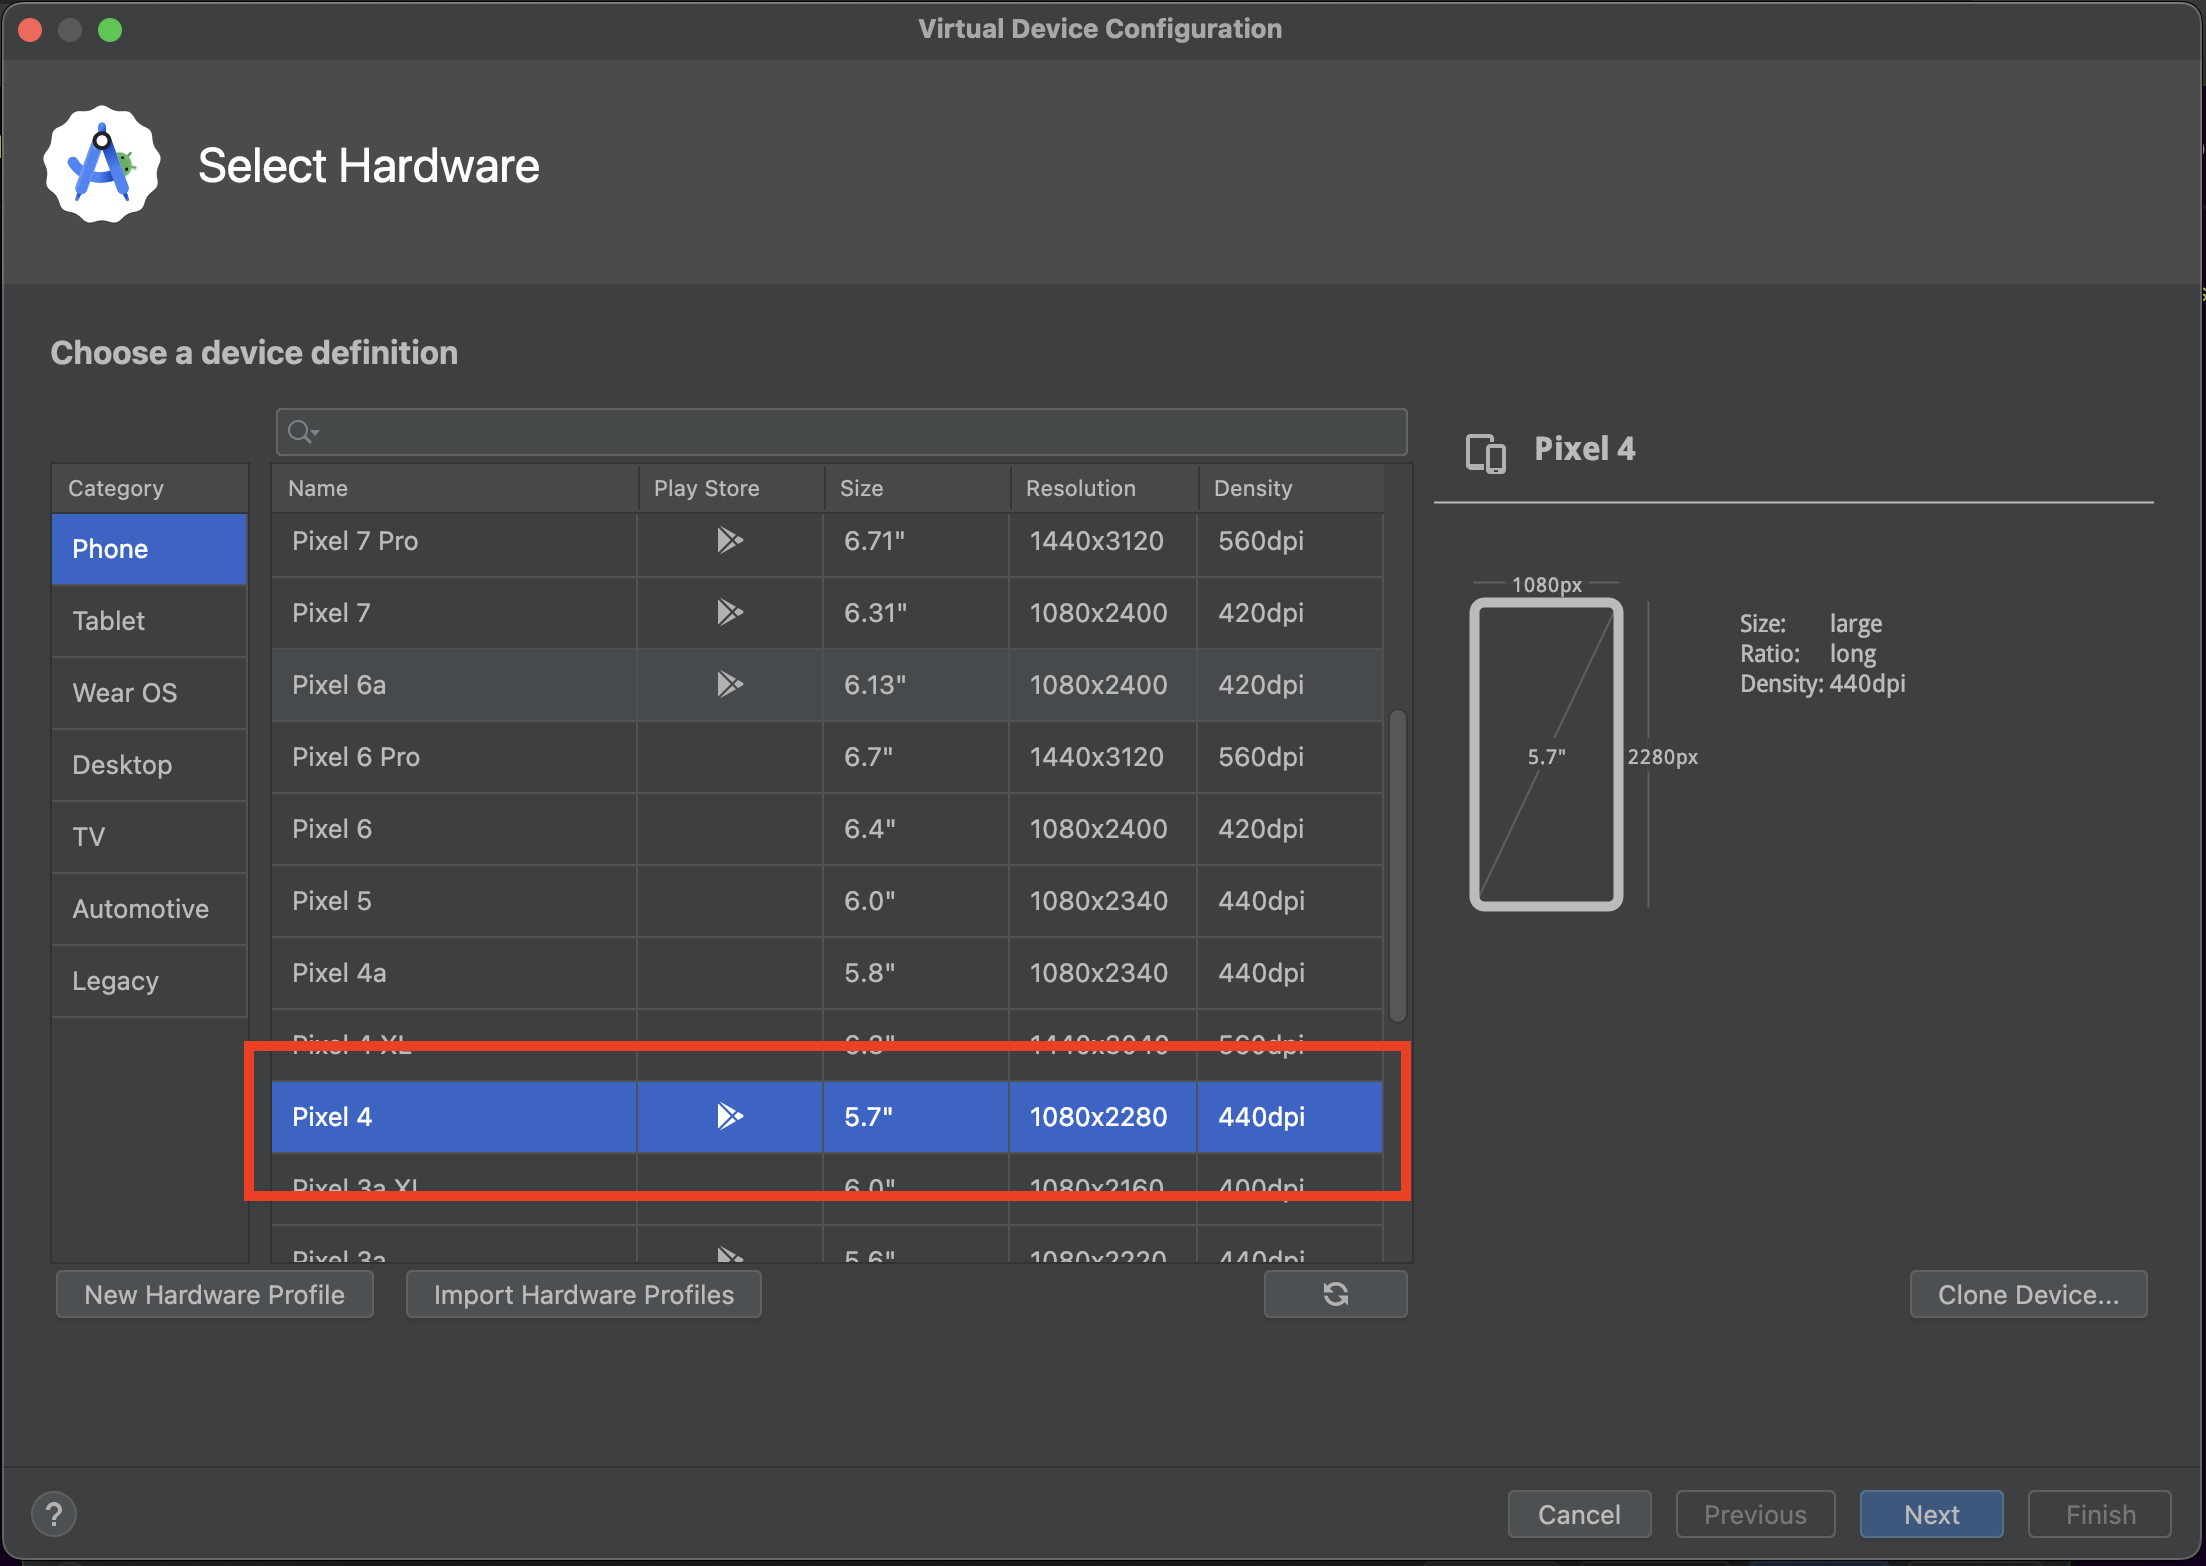
- Add "Pixel 4" that has the Play Store icon and click "Next".
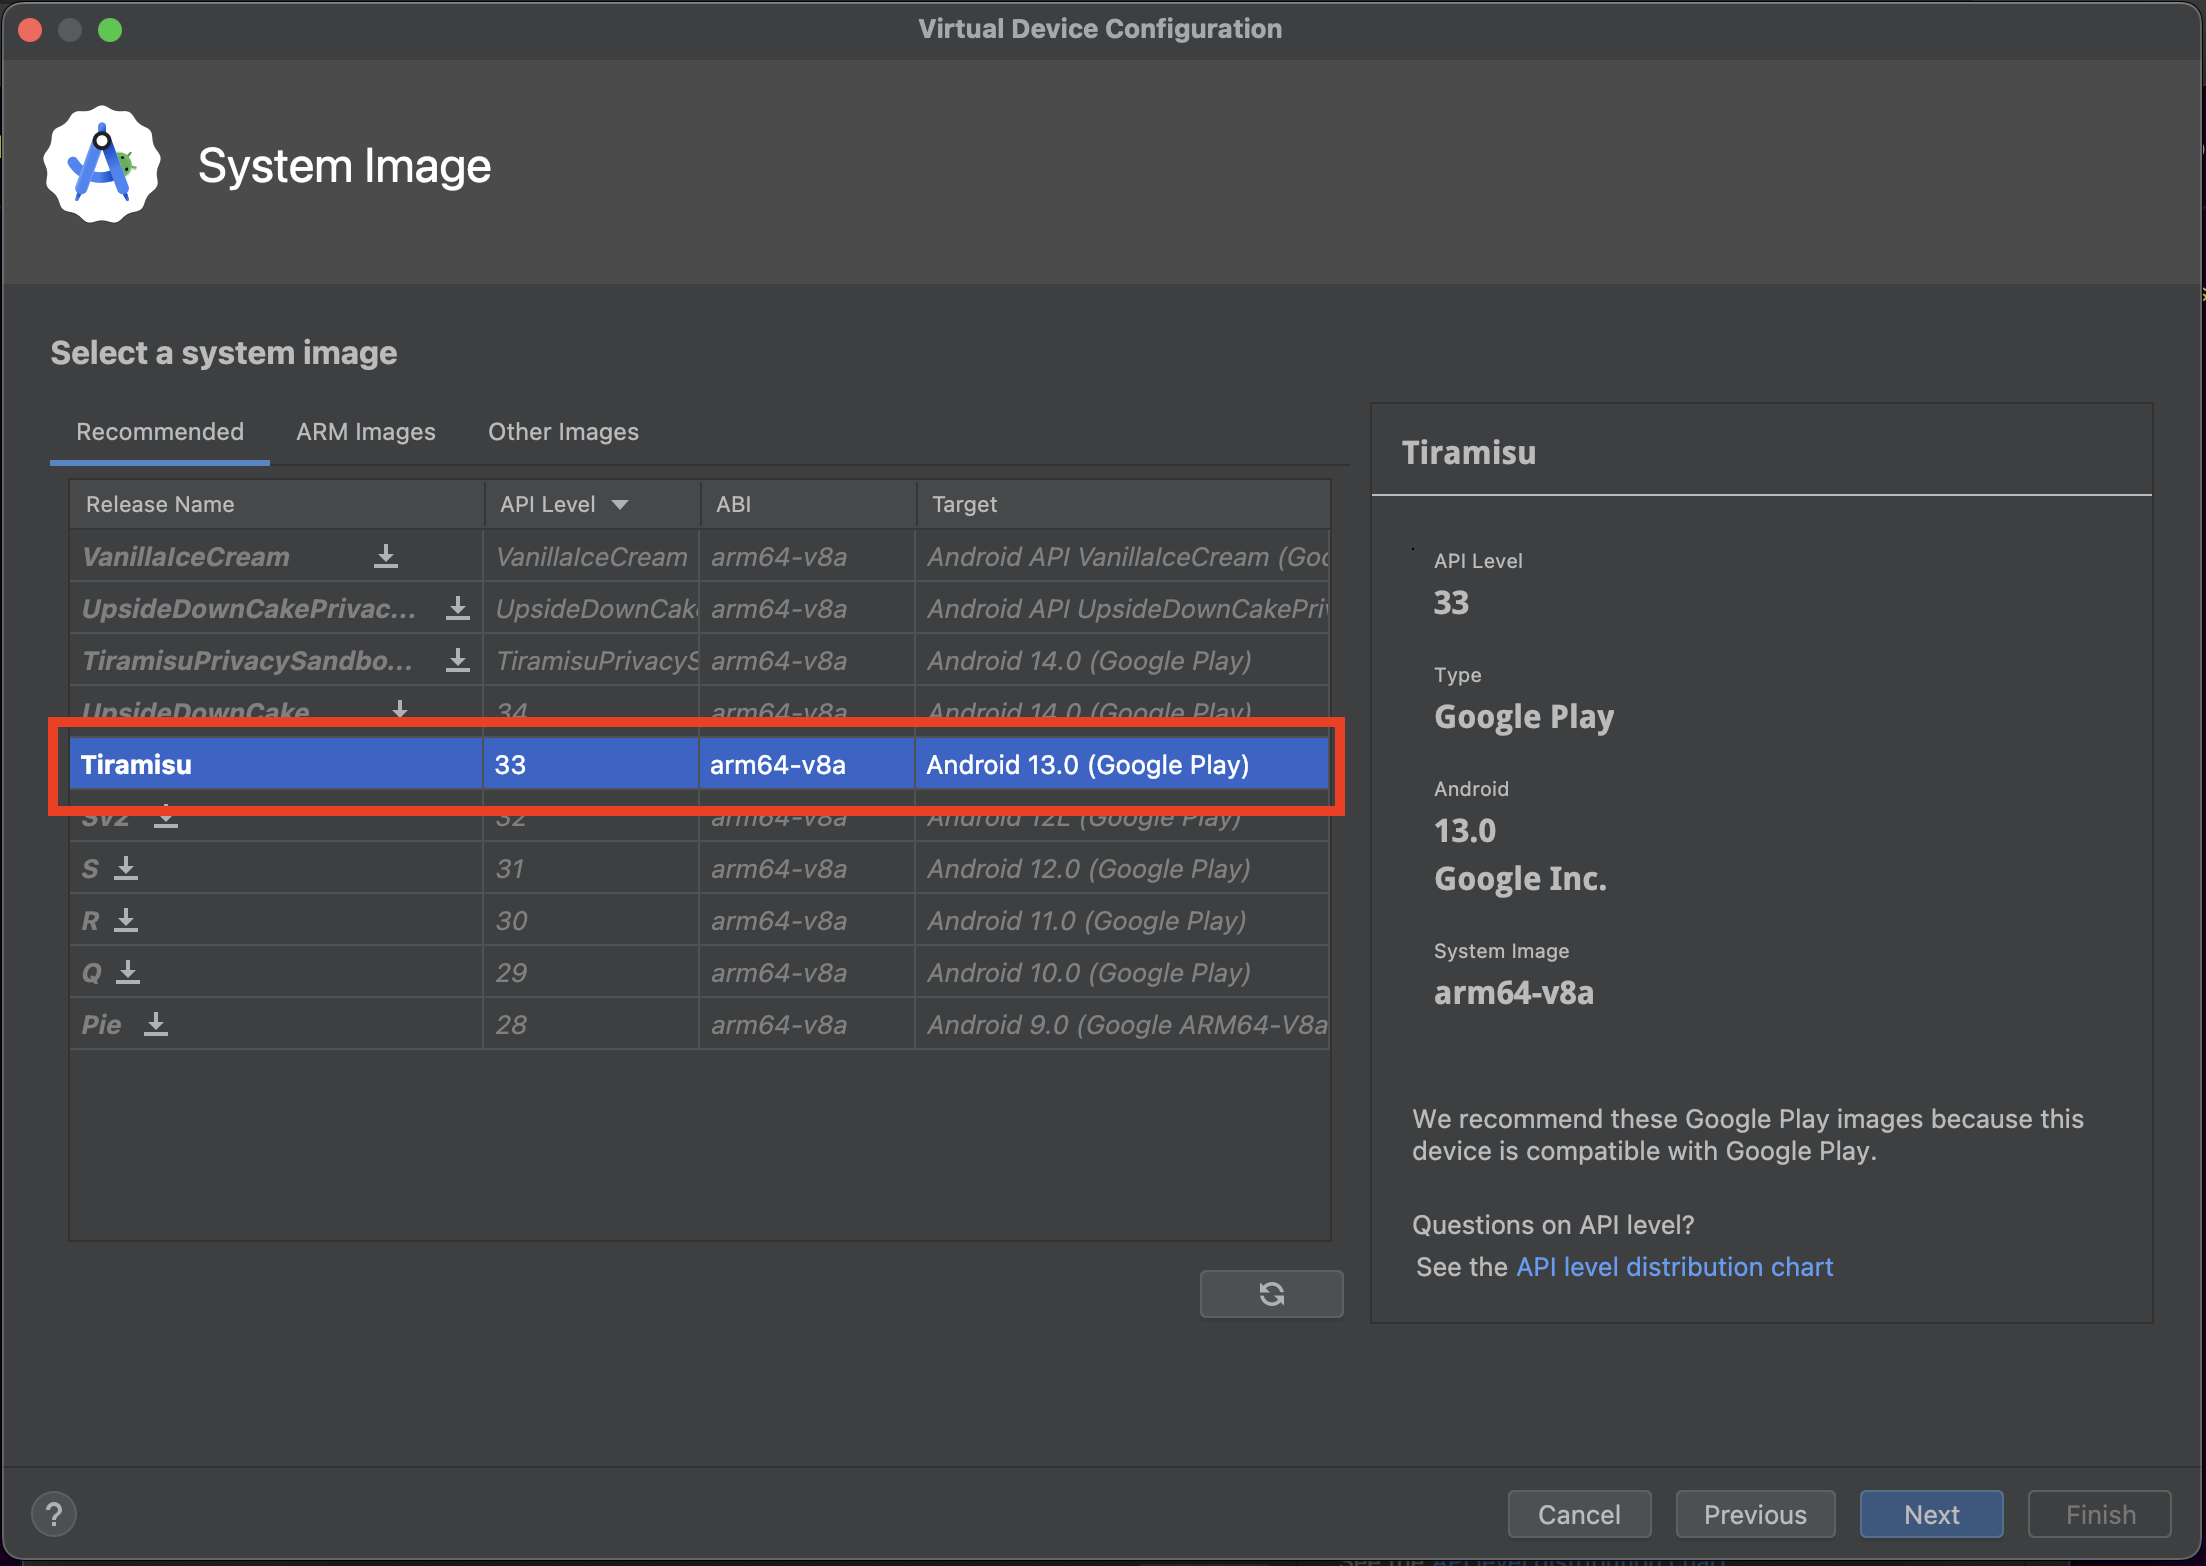
- Select the "Tiramisu" system image that will run inside the device you selected and click "Next".
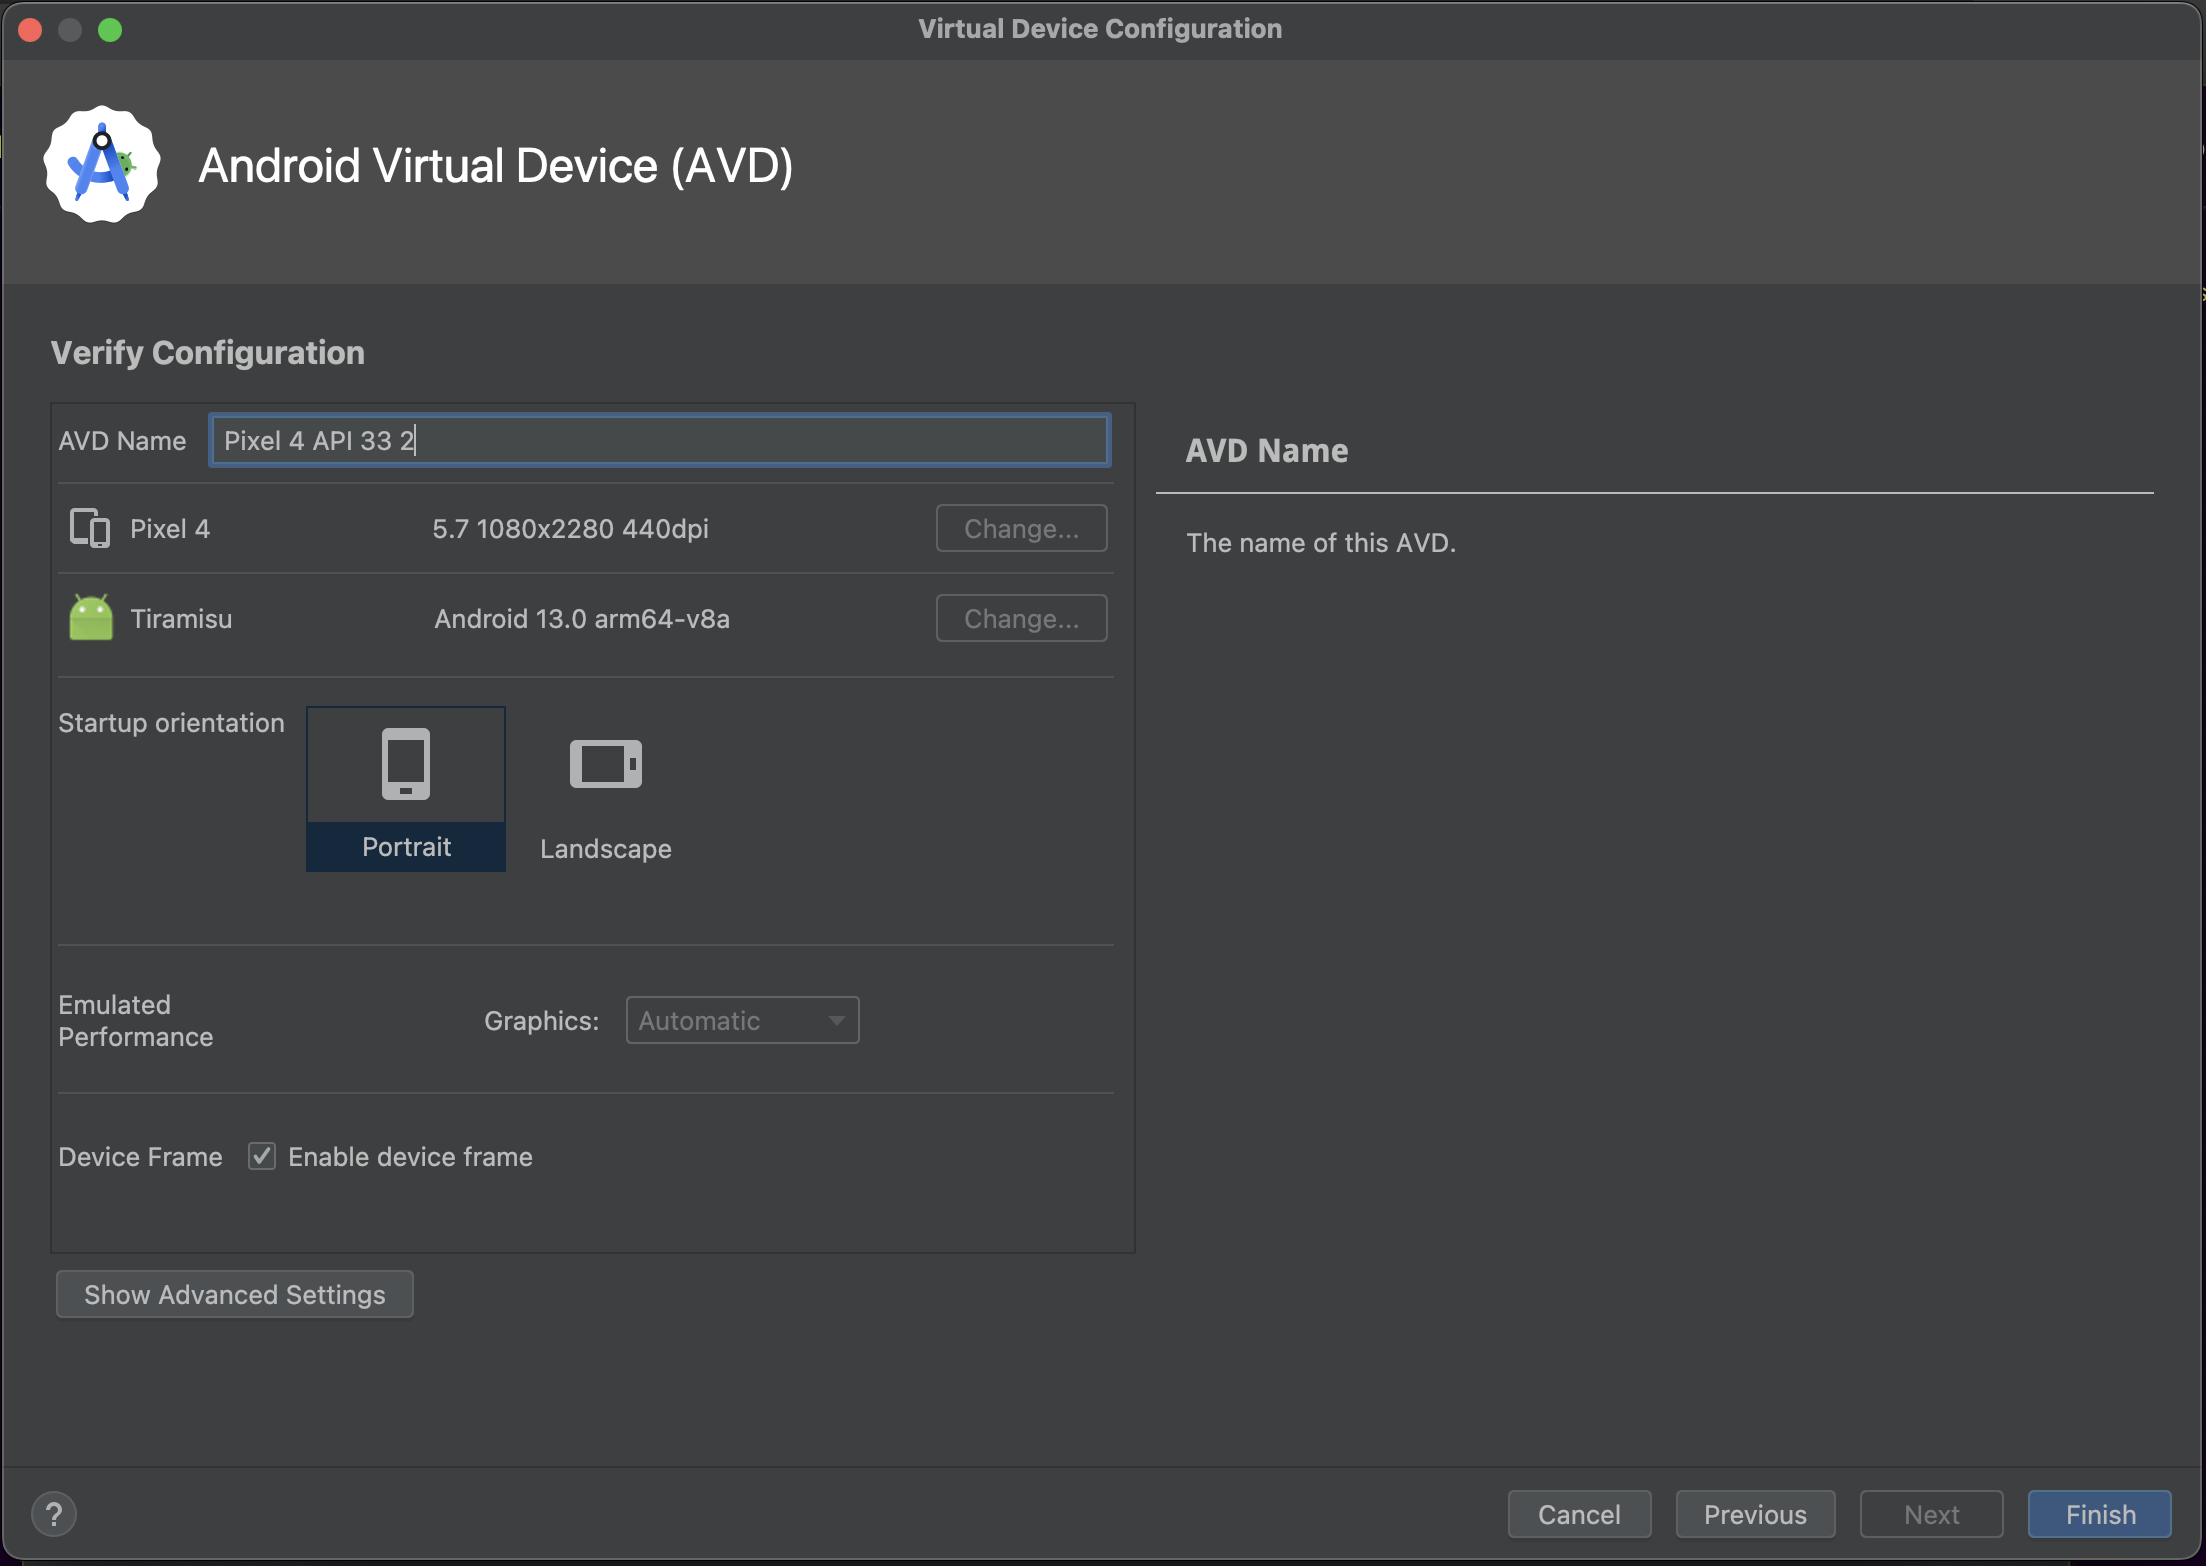
- You can edit the AVD name in this step, the AVD name is used to launch the device from the terminal.
Keep the orientation as Portrait for development purposes.
You can now click "Finish"!
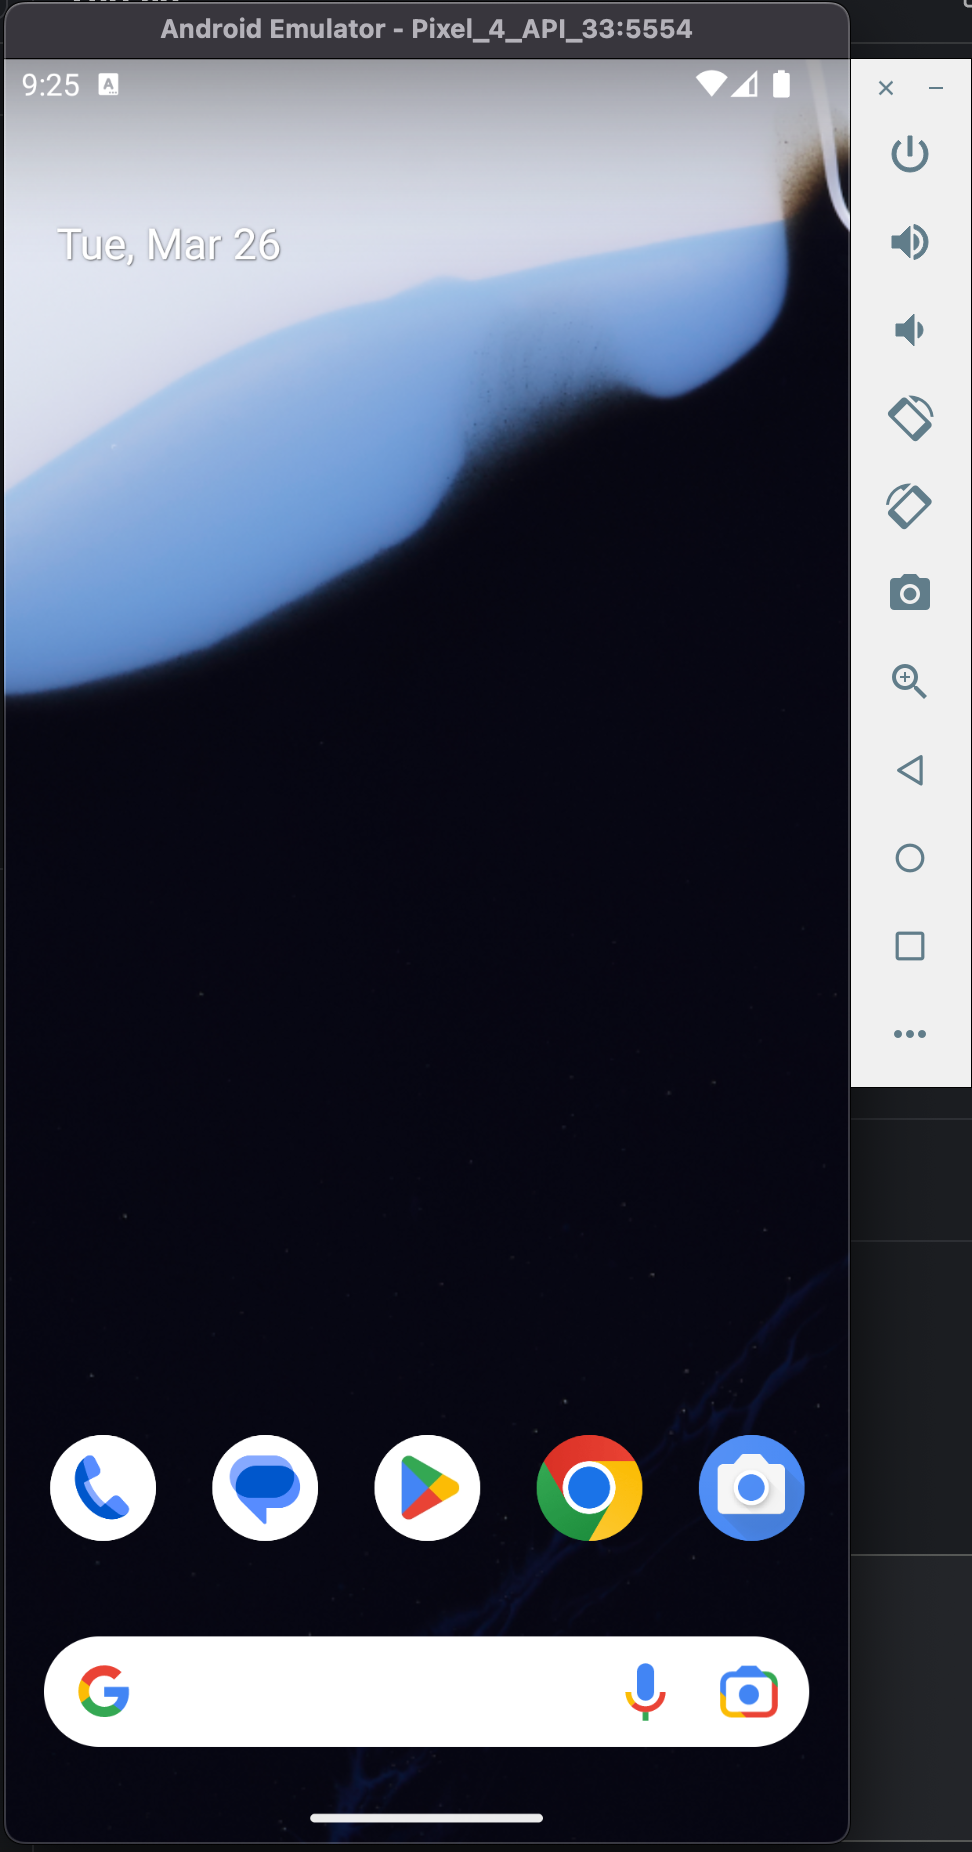
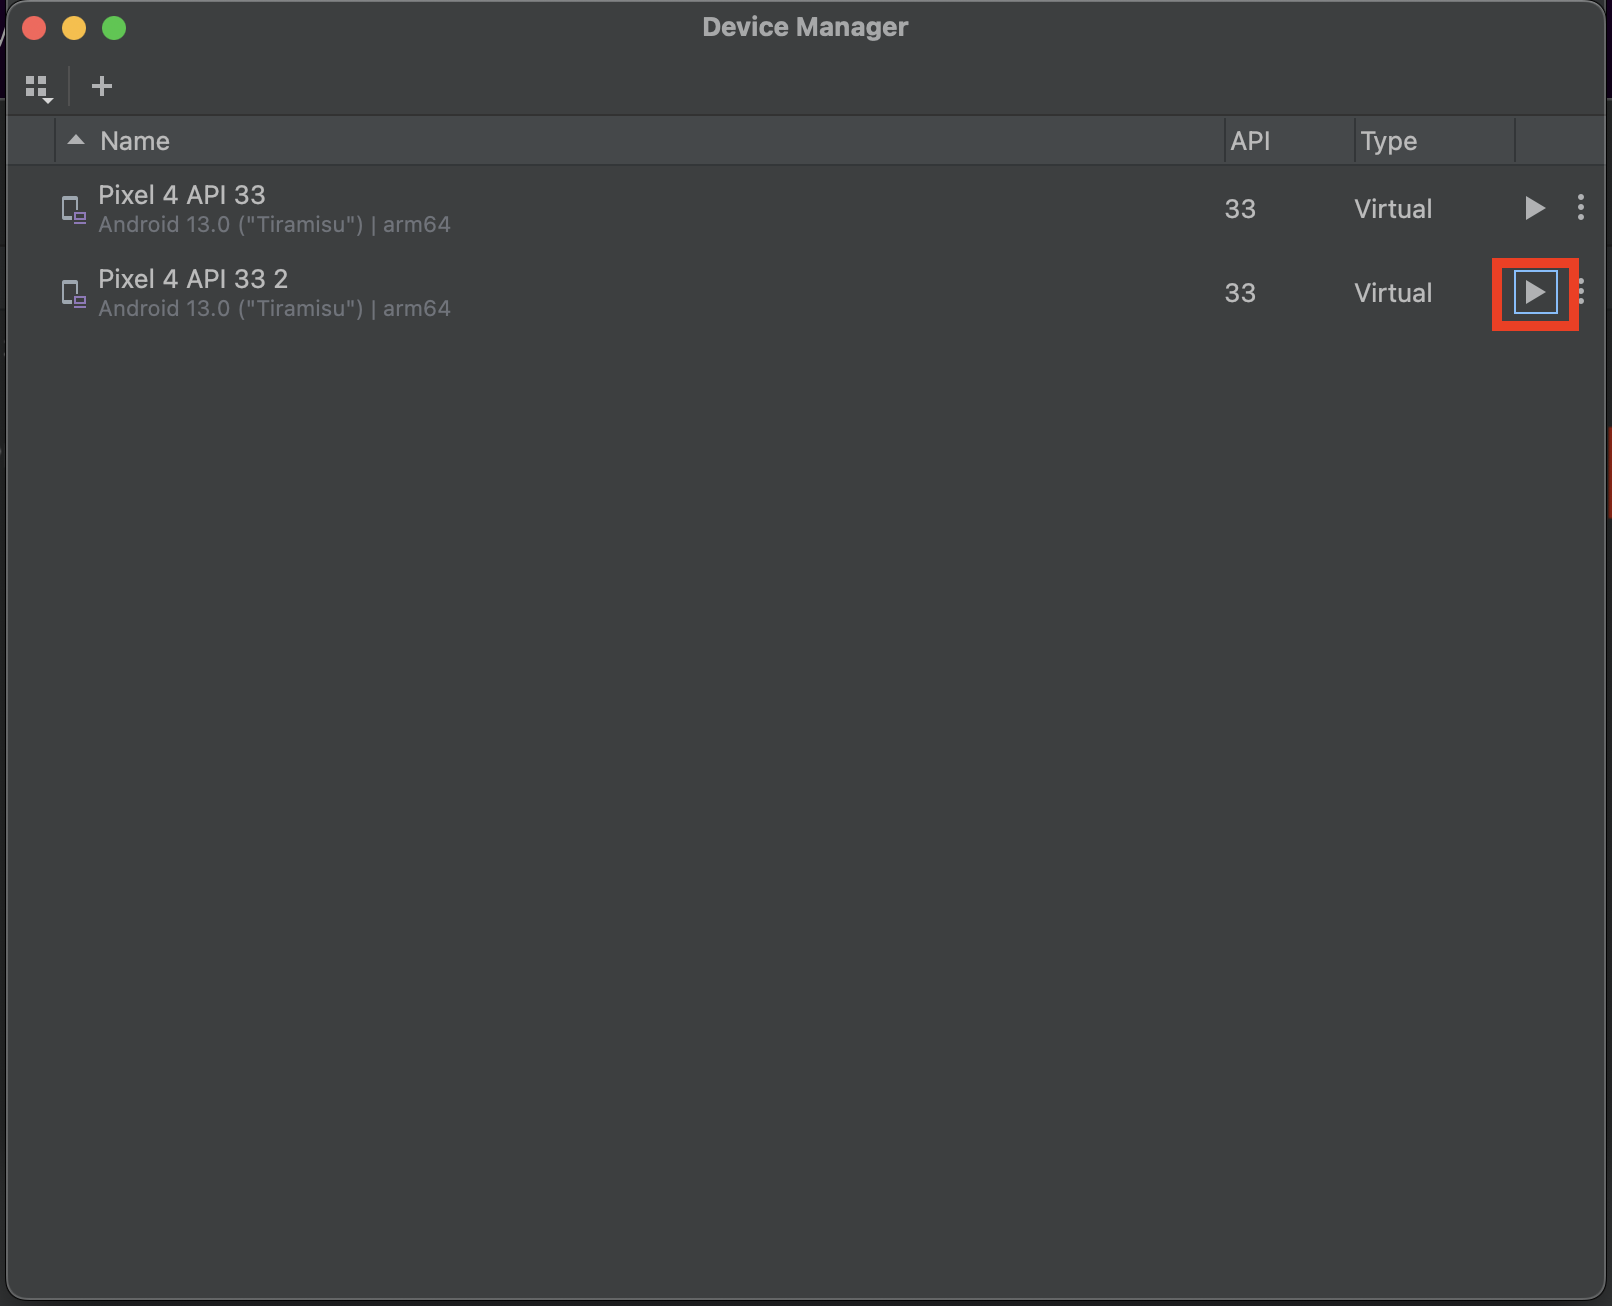
- You should now be able to see the device in the "Device Manager"!
You can use the Play button to start the device!
- On successful launch you should see the device!